 This post comes to us courtesy of Chi Dixon, blogger at Chi’s Food.
Fresh pasta is easy to make at home – you’ll find dozens of recipes online and in cookbooks. And with a little imagination, the varieties are endless.
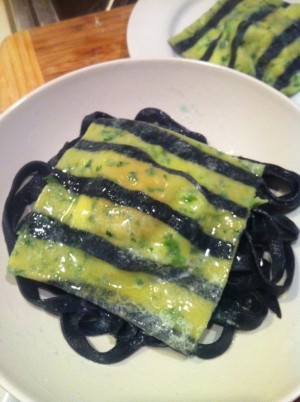
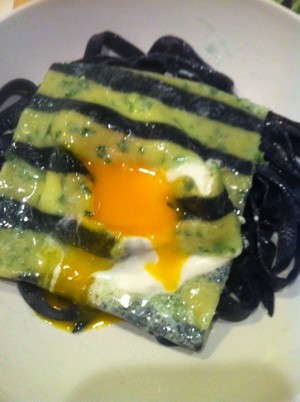
This striped ravioli is easy to make, looks super fancy and is fun to eat. When you cut into the ravioli, the gooey yolk mingles with the ricotta to make a rich molten sauce for the pasta – delicious!
Start with a basic pasta dough; the recipes vary wildly depending on your sources. The recipe below is one I find easy to use, as well as easy to convert to a vegan version by swapping out the egg with water or clear vegetable broth in the pasta dough. The filling here isn’t vegan friendly; as an alternative, try sweet peas mashed with a bit of mint leaf, or roasted butternut squash mashed with a bit of salt.
Striped Ravioli with a Gooey Egg Center
For the pasta:
2 cups all-purpose flour (plus a little extra for adjusting and dusting)
1/2 cup semolina flour
1/4 tsp. salt
4 Tbs. finely chopped fresh herbs – more or less, to taste (I chose flat-leaf parsley and basil, but you can use whatever fresh herbs you like)
4 eggs
3 to 4 Tbs. water (note: for the non-vegan set, a couple of tablespoons are all you need, if any; for the vegan version, you’ll be using water in place of eggs, roughly 1 cup to 1 1/2 cups of water or clear vegetable broth)
Coloring gel or natural colorants
For the filling:
1 1/2 to 2 Tbs. ricotta cheese for each ravioli
Salt and white pepper, to taste
Lemon zest, to taste
Alternatively, fresh or dried herbs are a nice touch
1 egg yolk per ravioli

To make the pasta, put the all-purpose flour, semolina flour and salt in a bowl. Make a well in the center, add the herbs and crack the eggs into the center well. Stir (I use a fork to start) to incorporate the flours and the egg until a dough starts to form. Then, with clean hands, grab it and start squeezing and kneading it — you want to get to a ball of dough that requires some effort to manipulate but is reasonably pliable and not sticky. If it’s sticky, add all-purpose or semolina flour. If it seems dry, crumbly or flaky, add water a few drops at a time.
Once the dough is fully incorporated, it’s going to need to rest. I usually put mine in a zip-lock bag and suck the air out of it, but plastic wrap would do the trick, too. You want to make sure as little of the dough as possible is exposed to air. Let it rest for 20 to 30 minutes or overnight in the fridge; this gives the gluten a chance to relax, and the dough will be significantly easier to work with.
For striped pasta, you’re going to need to color a portion of your dough. I used black coloring gel for a dramatic effect, but you can pick any color or even several if you like. If you prefer, you can use various natural colorants – powdered spinach or beets, for example. You could use liquid natural colorants (like beet juice) as well — just keep a handful of flour on hand to make sure you’re able to adjust the texture of the dough.

Break off a piece of your dough roughly the size of a golf ball. To avoid staining my hands, I usually put the uncolored dough into a zip-lock bag and add a touch of colorant in the bag. By massaging the pasta in the bag, you’ll be able to get most of the color blended in without getting it all over your hands. When the color appears to have blended in, you should be able to turn the dough out onto a counter so it can be kneaded until the color is uniform.
Once the dough is tinted to your liking, start rolling it out with a pasta machine. Stop when the thickness is on the second-to-last setting, then pass the dough through the fettuccine cutter on your machine. Lay the colored and cut pasta out flat and straight on a lightly dampened paper towel or dish towel and cover with another lightly dampened towel — you don’t want the pasta to dry while you make the base sheets.
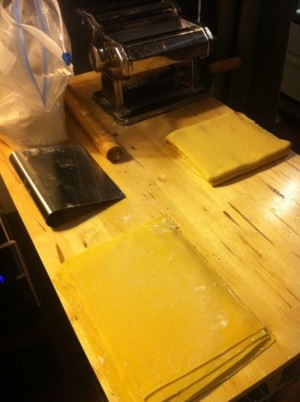
Using your pasta roller, roll out sheets of the uncolored pasta, taking the dough down to the second or third thinnest setting. Lay your uncolored sheet on a well-floured surface and wipe the exposed side with a lightly dampened paper towel. Lay the colored pasta on the uncolored sheet and press gently to adhere. Lightly dust the top of the pasta and run through the pasta roller. I start at a slightly wider setting (third or fourth) on the machine to set the stripes, then gradually move to thinner settings to get the right thickness for my ravioli. It takes some practice to get the stripes clean and straight, but even crooked stripes make delicious noodles!
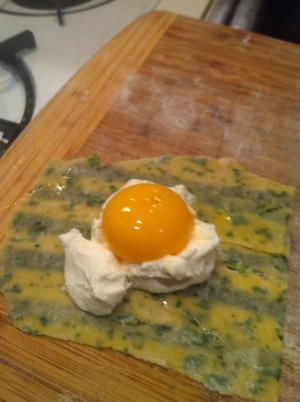
 To make the filling, season the ricotta cheese with a pinch of salt, a touch of white pepper and lemon zest to taste for brightness. (Alternatively, add a sprinkle of fresh or dried herbs chopped finely or crushed with a mortar and pestle.) Place a spoonful of cheese in the center of the bottom sheet of pasta and make a small well in the center. Gently place the egg yolk into the well in the ricotta. Carefully cover the filling with a second sheet of pasta, ensuring as little air as possible gets inside the pocket, and seal carefully.
To cook the ravioli, bring a pot of well-salted water to a rolling boil. Gently lower the ravioli into the boiling water and cook for 3 to 4 minutes — you don’t want to overcook the ravioli, because the appeal of this particular one is the gooey egg yolk.
Carefully remove the pasta from the water and serve. I like mine with a drizzle of browned butter and a slice of crispy pancetta.
About the author: Chi didn’t realize she could cook until she was well into her 20’s – then she discovered that it was one of the things she liked doing the most! As a top 100 contestant on MasterChef season 2, Chi discovered her hobby was more of a passion and has been exploring this passion since. Her objective is to de-mystify cooking and make it approachable and fun for anyone with the desire to set foot in the kitchen.

1 comment
[…] Striped Ravioli with a Gooey Egg CenterSep 6, 2011 … This striped ravioli is easy to make, looks super fancy and is fun to eat. When you cut into the ravioli, the gooey yolk mingles with the ricotta to … […]