All throughout January we’re bringing you 30 Days, 30 Ways to Good Health, a series of easy strategies for overall wellness (and because we love food, it’s focuses on the foods and cooking techniques to add into your life instead of what to take away.) Read on for our latest eat well strategy: do it yourself.
When you make foods yourself, in your own home, not only can you control your ingredients but you also get the rewarding experience of making something by hand. One of our favorite foods to make it home is cheese. It much simpler than you think, and the results are rewarding — both for you and for the lucky people who receive your homemade gift. The cheeses you make at home will be exceptionally flavorful and easy to customize, and you’ll be proud to share them with friends and family.
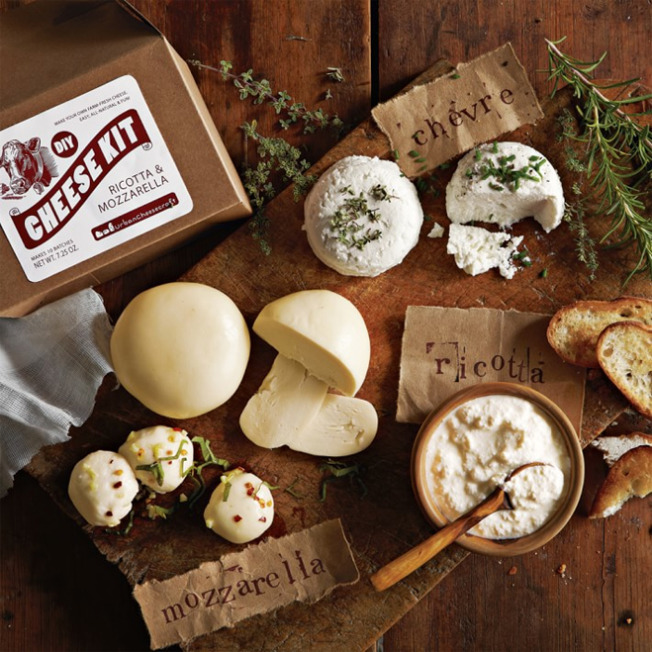
Keep reading to learn how to make fresh ricotta and mozzarella with our cheese-making kits, and see some of our favorite variations and serving ideas.
½ cup cool, chlorine-free water
1 tsp. citric acid
1 gallon milk
1 tsp. cheese salt, or to taste
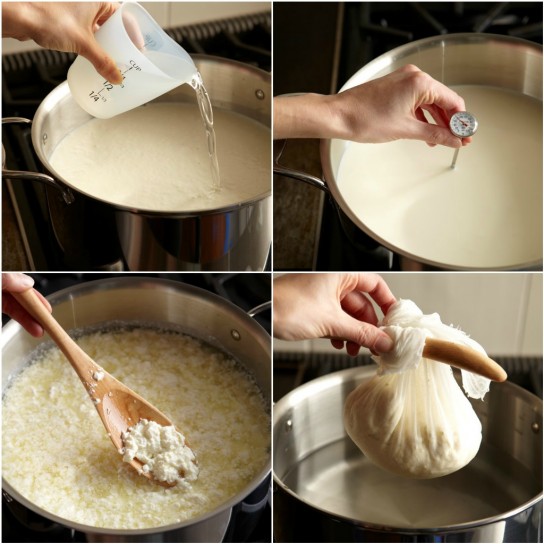
STEP 1: Pour the water into the small bowl and stir in the citric acid.
STEP 2: Pour the milk into the large pot, add the citric acid solution and cheese salt and stir well.
STEP 3: Set the pot over medium heat and heat, gently checking the bottom of the pot with the slotted spoon for any scorching every 2 minutes or so. Avoid stirring as much as possible to allow curds to form. If the milk seems to be sticking, reduce the heat to medium-low. Heat the milk to 180° to 185°F; do not allow the mixture to boil over.
STEP 4: As soon as the curds and whey separate clearly (you will see white curds floating in yellowish whey when you move the curds), turn o the heat. Let stand, undisturbed, for 10 minutes.
STEP 5: Line the colander with the cheesecloth; if you want to keep the whey, place the large heat-resistant bowl under the colander, then carefully pour the curds and whey into the colander. Drain until the cheese reaches the desired consistency, 15 to 30 minutes. To expedite the process, gently lift the cheesecloth by the corners and rock the curds around. The cheese may be served or used in recipes immediately. Store any leftovers in a covered container in the refrigerator for up to 1 week. Makes about 1 lb.
Fresh Mozzarella
1½ cups cool, chlorine-free water
¼ rennet tablet
1½ tsp. citric acid
1 gallon milk
1½ tsp. cheese salt, or to taste
Herbs (optional)
STEP 1: Pour ½ cup of the water into a small bowl and dissolve the ¼ rennet tablet in the water. (Wrap the remaining pieces of tablet and store in the freezer.)
STEP 2: Pour the remaining 1 cup water into another small bowl and stir in the citric acid.
STEP 3: Pour the milk into the large pot, add the citric acid solution and stir well. Set the pot over low to medium heat and heat, stirring occasionally with the slotted spoon to prevent scorching, until the milk reaches 90°F. This can happen quickly, so watch carefully.
STEP 4: Slowly stir in the rennet solution using a gentle up-and-down motion for about 30 seconds. Continue heating to 105°F (110°F if you will be using the Water Bath Method; see inset box).
STEP 5: The curds could already show clear signs of coagulation: They will look like shiny yogurt, you will see a separation between curds (white and “solid”) and whey (yellowish liquid), and the curds will pull away from the sides of the pot. If so, stir very gently for 1 minute, then turn o the heat and proceed to Step 6. If the curds don’t look like shiny yogurt but instead look like clumps of melted cheese floating in yellow liquid, proceed to Step 6. If you don’t see signs of coagulation yet and the whey is still milky instead of yellow, heat a little longer (110°F maximum) while gently moving the curds around with the spoon (not stirring, just moving). You are now cooking the curds and expelling more whey. If the temperature reaches 110°F and you still don’t see signs of coagulation, remove the pot from the heat and let stand for 15 to 45 minutes. When you see signs of coagulation, proceed to Step 6. Note: If the milk did not form curds at all, you may have been using unlabeled ultra-pasteurized milk. Use a di erent brand of milk and try again.
STEP 6: Ladle the curds into the large heat-resistant bowl. At this point, you can cover and refrigerate the curds for stretching later or continue as directed. Note: If you will be using the Water Bath Method (no microwave), reserve the whey in the pot and follow the instructions in the inset box. If you will be using a microwave, continue with Step 7.
STEP 7: Ladle the curds into the large microwavable bowl. Put on rubber gloves or use the 2 large spoons for steps 8 through 12. Gently hold back the curds while you pour o the whey (don’t press much).
STEP 8: Heat the curds in the microwave on medium power for 1 minute.
STEP 9: Gently use the spoons to fold the curds over several times and evenly distribute the heat. Again, drain o any whey.
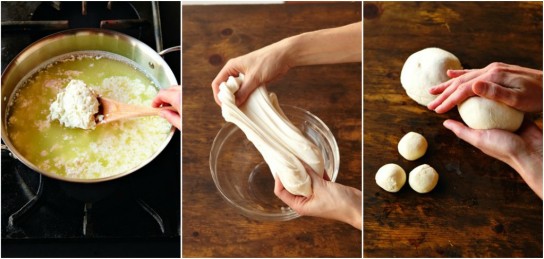
STEP 10: Microwave for 30 seconds more, then drain again. Gently fold the curds over once or twice to distribute the heat evenly. Check the temperature by covering at least 2 inches of the thermometer’s probe with curds; they must reach 135°F to stretch properly. If the curds have not reached this temperature, microwave for 30 seconds more.
STEP 11: Add the cheese salt and herbs and blend them into the cheese by stretching and folding gently, just until incorporated. For the best texture, heat, fold and stretch the curds as little as possible.
STEP 12: Shape the cheese into a ball or other shapes. The mozzarella is best eaten immediately but can be covered and refrigerated for up to 1 week. Do NOT store the cheese in water or whey or it will become slimy and disintegrate. Makes about 1 lb.
Water Bath Method (no microwave) — If you will NOT be using a microwave, follow these instructions:
After ladling the curds into the heat-resistant bowl, heat the whey in the pot to 185°F (no hotter or you’ll overcook the curds), then remove the pot from the heat. Gently shape half of the curds into a ball (as much as possible); using the slotted spoon, dip the ball into the whey until the curds reach 135°F (heated to the core), usually 2 to 3 minutes. Put on rubber gloves or have the 2 large spoons ready. Lift the ball of curds out of the whey. Place it in the heat-resistant bowl and proceed with salting, folding and shaping using either gloved hands or the 2 spoons, as described in steps 11 and 12. Repeat with the remaining curds, more than once if necessary to create a smooth ball of cheese. If you work slowly, you may need to reheat the whey, but no hotter than 185°F. If temperamental curds don’t stretch much, just salt, fold and shape the warm curds into balls.
- Enhance the flavor of the cheeses by adding herbs, spice blends, diced sun-dried tomatoes, dried jalapeños or red pepper flakes when you add the salt.
- Shape mozzarella cheese into bite-size balls, knots or braids. To “set” the shapes of mozzarella cheese, dunk it into a bowl of salted ice water (1 tsp. salt dissolved in 4 cups water) for 15 minutes.
- Use ricotta to make a delicious cheesecake, or sweeten with maple syrup and serve on pancakes.
- Reserve whey and use as you would milk or buttermilk in biscuits, pancakes or smoothies.


