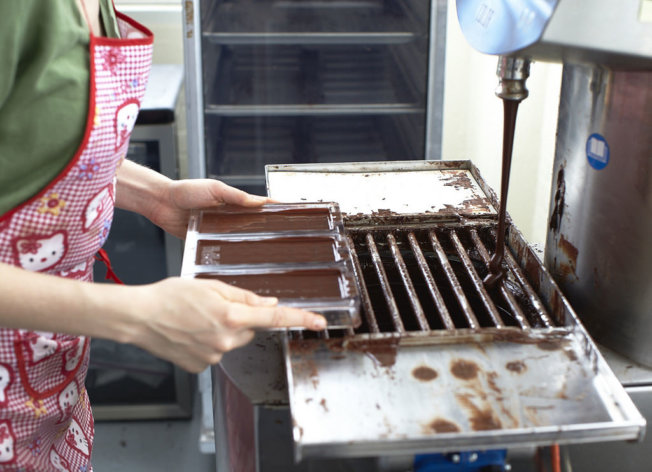
Chocolate being tempered at Dandelion. Photo credit: Laurie Frankel for Dandelion Chocolate
If you love working with chocolate in the kitchen, chances are at some point that you’ll need to temper it yourself. Tempering—a process that involves heating and cooling chocolate to create a uniform crystal structure that ensures chocolate is firm, smooth and shiny—is an important step when pouring chocolate into seasonal molds, enrobing truffles, or dipping cookies, pastries or dried fruit in chocolate.
To demystify the process (which can be more than a little intimidating!), we turned to Lisa Vega, chef at Dandelion Chocolate, a bean-to-bar chocolate company. Dandelion’s factory, which is located in San Francisco’s Mission District, makes single-origin chocolate out of just two ingredients, cocoa beans and organic cane sugar. From the sorting of beans to the foil-wrapping of chocolate, everything is made on site and done by hand in small batches (on average, the factory currently produces about 550 bars per day).
Lisa walked us through the step-by-step process, offering her expert tips and troubleshooting advice along the way.
How to Temper Chocolate Like a Pro
First, cut your chocolate to uniform size before melting. Lisa recommends chopping chocolate into rough 1-inch squares prior to melting; this allows it to melt faster. And while some recommend using electrics, she doesn’t: “I wouldn’t use a food processor,” she says, cautioning, “The heat generated can melt the chocolate!”
 Stick to a simple technique for melting chocolate—no fancy sous vide machines, microwaves or other gadgets needed. “I like to use a double boiler,” Lisa tells us. “I find it the most efficient way in my kitchen.” Lisa melts her chocolate to 54ºC (129ºF) to avoid it getting too hot, which can cause problems like streaking.
Begin tempering your chocolate. Transfer your melted chocolate into a mixing bowl, and stir your chocolate almost constantly to help it cool down, scraping the sides of the mixing bowl as you go.
“Seed” your chocolate while tempering. Another useful technique to employ while tempering is the technique of “seeding” chocolate, which means adding unmelted chocolate to melted chocolate while you’re tempering it, to help cool down the overall temperature. “I melt about two thirds of the total amount I will need, and add the remaining amount [unmelted] to bring the temperature down and back into temper,” Lisa says.
Use a thermometer! “I’ve done this [tempering chocolate] enough that you can tell when it’s tempered by the feel,” Lisa tells us. “You can tell if the chocolate’s too thick or too loose.” But despite her experience, she still uses a thermometer every single time she brings chocolate to temper, since the margin for error is still small. Chocolate is tempered between 30º-32ºC (86º-90ºF). While you could use the most basic of instant thermometers, Lisa uses an infrared thermometer in the Dandelion kitchen.
Conduct a temper test. To ensure that you’ve properly tempered your chocolate, conduct a mini temper test. Once Lisa thinks her chocolate has been properly tempered, she dips an offset spatula into the chocolate, then sticks the spatula in a refrigerator for a few minutes. When she checks on it, the chocolate on the spatula should be shiny without any bloom streaks. Once your batch of chocolate has reached temper, about 10 to 15 minutes to set up and solidify.
Troubleshooting: When Tempering Goes Wrong
Tempering takes practice, and it’s inevitable that things will go awry. Here’s Lisa’s advice if you run into the following issues.
Scenario #1: You’ve accidentally gotten a few drops of water into your chocolate during the tempering process.
What to do: Toss everything and start over. “I have found that once water is introduced to chocolate during the tempering process, it’s best to just start over,” Lisa says.
Scenario #2: Your chocolate looks streaky.
What to do: “If the chocolate appears ‘streaky,’ that means the chocolate has falling out of temper,” Lisa explains. Those streaks—also called blooms—can indicate the chocolate was too cold or too hot and needs to be re-tempered.
Scenario #3: Despite following tempering instructions, your chocolate doesn’t want to set up properly and is still soft to the touch after cooling.
What to do: “If the chocolate is not properly tempered, you can put it in the refrigerator for 5 minutes to help it set up, but if after 10-12 minutes it’s not set up, then it’s more than likely not in temper,” Lisa says. Try re-tempering it by bringing it back to 30º-32ºC.
Have you ever tried to temper chocolate? Share your advice with us below!

4 comments
I feel like they leave off some important info here.. you have to be in a room that’s between 59 and 70 degrees to temper chocolate in my experience
I’ve hand temperated chocolate for over 30 years, usually to coat chocolate truffles.
Melting and heating chocolate to 129 degrees is a risky and scary move as the fats in the chocolate may begin to separate, especially if you overshoot by even a degree to two. In a double boiler, realize that the chocolate next to the side of your pot may be +5 degrees hotter than at the center.
The safer bet is to limit the high temperature to around 115-118 degrees. This lower temperature will also reduce the time it takes to bring the chocolate to temper.
Are these instructions for dark chocolate? 70% specifically? I’ve tried tempering chocolate many times, never with perfect results. Would love to try this but want to know the specific chocolate first as I understand the temperature is different for each type. Thanks!
Hi Nancy, We checked with Lisa and the specific temeratures in the blog are for our 70% chocolate—milk chocolate and white chocolate will have slightly different ranges.