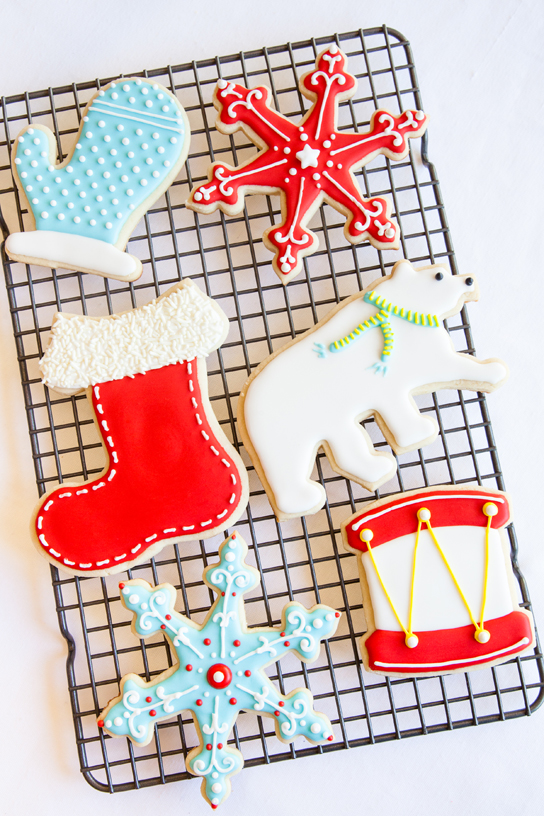
 Beautifully decorated Christmas cookies make a wonderful and impressive gift that are almost too gorgeous to eat. These works of edible art can be mastered at home easily; all it takes is the right tools and a little bit of practice. We talked to food stylist Cathie Lopez about her tips, tricks and recipes for making foolproof, exquisite cookies every time.
STEP 1: Bake your cookies!
Pick your favorite sugar cookie recipe and select your favorite cutters. Cathie swears by the recipe below, developed over years of trial and error with various sugar cookie recipes. “My sons and their friends were the lucky recipients of all my rejects,” says Cathie.
Cookie Dough
1 cup butter, room temperature
1 cup sugar
1 large egg
1 tsp. vanilla
2 tsp. baking powder
3 cups flour
Preheat oven to 400ºF.
Cream butter and sugar together. Mix in egg and vanilla, and then add baking powder. Add flour one cup at a time until dough is very stiff. Chill for approximately 20 minutes. Roll out on a floured surface to 1/4- 3/8” thickness. Cut out shapes and bake for 6-7 minutes. Baked cookies will look white and under cooked and should only be very, very slightly browned on the edges. Cool cookies on a rack completely before icing. Makes approx. 24 small, 18 medium & 12 large cookies.
STEP 2: Make your icing
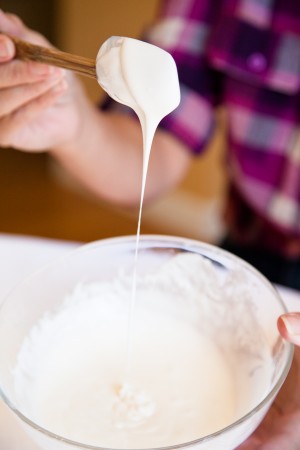
“The consistency of the icing is key to decorating cookies successfully. It should have a texture that’s not too thin or thick–when it falls flat in ribbons back onto itself, that’s when you’ll get the best results,” says Cathie. She makes a big batch of white, and then smaller batches of colors. “I buy gel food coloring from craft supply stores. You get much more intense colors from them.”
ROYAL ICING
1-1/2 Tbs. meringue powder
2 -2 ½ cups sifted powdered sugar
½ tsp. vanilla
4-6 Tbs warm water
Optional: gel food coloring
In a mixing bowl, combine powdered sugar and meringue powder. Gradually add warm water. Add vanilla and mix until smooth. Add coloring if using and mix until desired color is reached. Cover bowl with plastic wrap, and let sit for 30 minutes to get the air bubbles out.
STEP 3: Ice
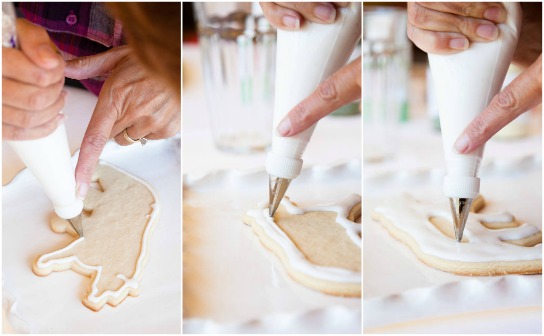
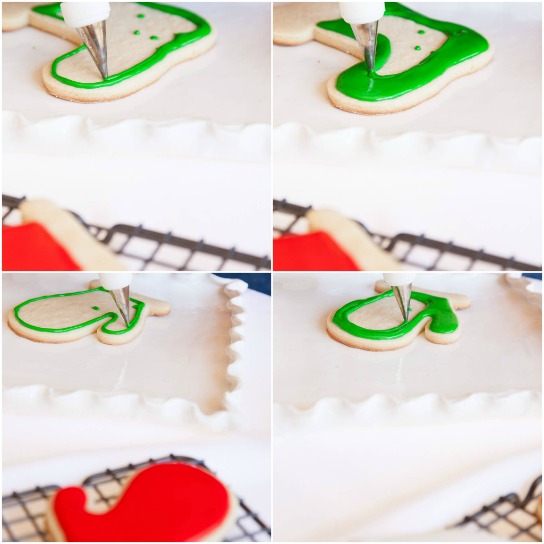
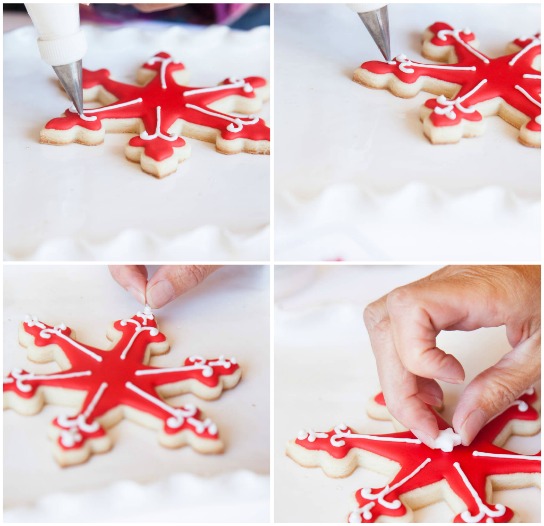
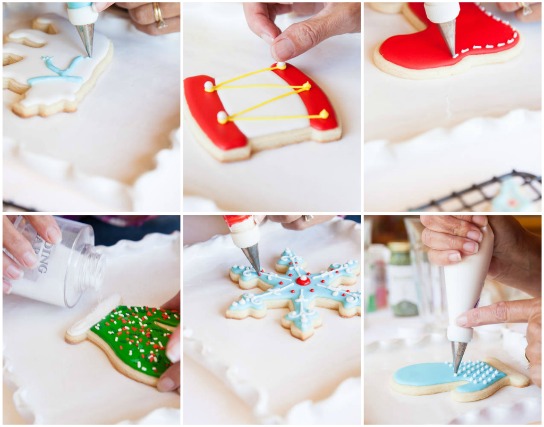
Cathie uses a pastry bag fitted with a number 3 tip do the initial icing that covers the entire surface of the cookie, which she calls “flooding.” Starting with the perimeter, she pipes in the icing at the outer edge of the cookie, and then works her way back around the perimeter, filling in the cookie with icing as she goes. Use your finger to guide the pastry bag in a straight line.
When icing a cookie that has two different, contrast colors, Cathie recommends icing in white first, and then letting it dry up to 24 hours until it is completely dry to the touch, so the colors won’t run.
If your icing seems too thick, you can add water to the batch to thin it out. Alternately, add powdered sugar to thicken your icing.
STEP 4: Decorate
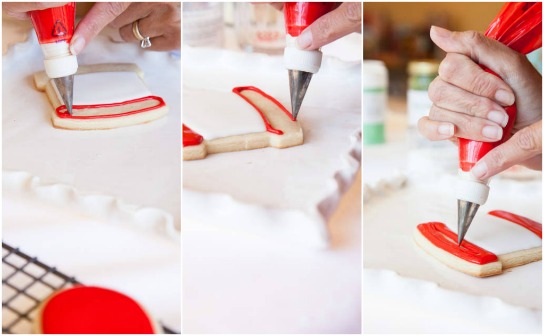
If you plan to decorate your cookies with beads, sprinkles, or sugars, it’s okay if they are still a little bit wet—this will help the decorations adhere to the cookie. If you are going to use additional icing layers as decorative elements, let your cookies dry completely before adding the other layers; Cathie lets hers dry for up to 24 hours.
When using icing for decoration, it should be thicker than the icing you used to flood your cookies. Add powdered sugar until the icing is your desired consistency. Cathie uses a #2 tip for decorating.
STEP 5: Gift
Wrapped in cellophane, tied in ribbon, packed and wrapped in boxes: See our tips for creating beautiful wrappings for homemade gifts.
 Special thanks to Cathie Lopez for letting us watch her amazing decorating skills in action. We can’t wait to start making our own Christmas cookies!
Photos by Alison Christiana.


