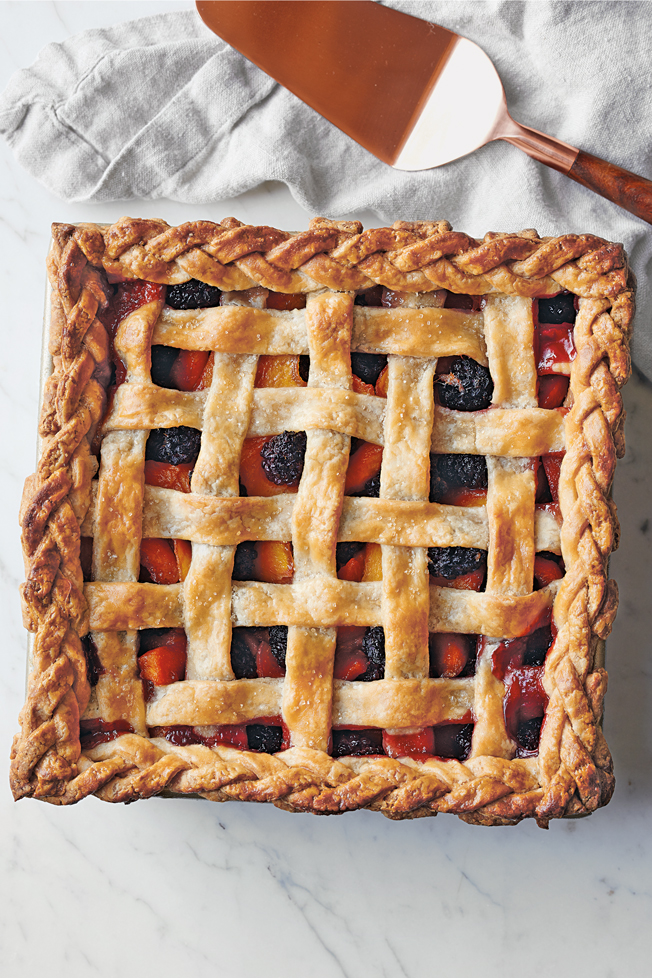
This summery fruit pie is as pretty as a picture, with its peach and blackberry filling peeking out from between the lattice crust. Making the braided pastry edge is entirely optional, but if you want to make your pie look like the one shown here, make an extra batch of pie dough. Then, after you add the lattice and trim it, roll out a dough square that is a little larger than the pan and cut it into 12 thin strips. Braid 3 strips for each side, brush the edges of the pie with egg wash, and press the braids into place before trimming any excess.
Gingered Peach-Blackberry Pie
Ingredients
- 2 batches Basic Pie Dough
- All-purpose flour for dusting
- 8 cups (3 lb./1.5 kg) peeled fresh or thawed frozen peach slices (from about 7–8 fresh peaches)
- 2 pints (1 lb./500 g) fresh or thawed frozen blackberries
- 3/4 cup (6 oz./185 g) firmly packed light brown sugar
- 1 Tbs. fresh lemon juice
- 1/4 cup (1 oz./30 g) cornstarch
- 1 1/2 tsp. minced peeled fresh ginger
- Pinch of kosher salt
- 1 large egg beaten with 1 tsp. water
- Turbinado sugar for sprinkling
Directions
1. Make the pie dough. Preheat an oven to 350°F (180°C).
2. On a lightly floured work surface, roll out 1 dough disk into a 12 1/2-inch (31.5-cm) square. Roll the dough around the rolling pin and unroll it into an 8-inch (20-cm) square deep baking dish. Gently press the dough into the bottom and sides of the dish. Trim the edges flush with the trim. Refrigerate for 30 minutes.
3. In a large bowl, toss together the peaches and blackberries. Add the brown sugar, lemon juice, cornstarch, ginger and salt and toss until well combined. Pour the filling into the crust.
4. On a lightly floured surface, roll out the second dough disk into a 10-inch (25-cm) square. Using a ruler as a guide, cut out as many strips as you can, each about 3/4 inch (2 cm) wide. Lay half of the strips on top of the filled pie, spacing them evenly apart and leaving some space between them. Fold back every other strip halfway and lay down a strip perpendicular across the unfolded strips, then unfold the strips back into place. Fold back the alternate strips and repeat to lay down a strip perpendicular. Repeat to place the remaining strips of dough evenly across the top, folding back the alternate strips each time. Roll together the ends of the lattice strips and the overhanging edge of the bottom crust so that they sit stop the rim of the pie dish. Flute of crimp the edge, unless you are making the braided edge (see above).
5. Brush the crust with the egg mixture and sprinkle with turbinado sugar. Place the pie dish on a baking sheet.
6. Bake until the crust is golden brown and the filling is bubbling, 1 to 1 1/4 hours, covering the top and edges with aluminum foil if they brown too quickly. Let cool on a wire rack for at least 4 hours, and preferably overnight, before serving. Serves 8 to 10.

For this and many other ideas for sweet and savory pies, check out The Pie Cookbook, our all-inclusive guide to making pies by the cooks of the Williams Sonoma Test Kitchen.


 Based on 1 Review(s)
8 comments
Your article is very useful and has good knowledge. I appreciate your efforts and all the best. It’s very useful information. I will be waiting for your next post. Keep It up.
https://kreativuse.com/october-2018-calendar/
Your article is very useful and has good knowledge. I appreciate your efforts and all the best. It’s very useful information. I will be waiting for your next post. Keep It up.
https://calendars.pictures/october-2018-calendar/
[…] This summery fruit pie is as pretty as a picture, with its peach and blackberry filling peeking out from between the lattice crust. Making the … read more The post Gingered Peach-Blackberry Pie appeared first on Williams-Sonoma Taste. source… […]
Your article is very useful and has good knowledge. I appreciate your efforts and all the best. It’s very useful information. I will be waiting for your next post. Keep It up.
What kind of square dish did you use?? Just an 8″ square pyrex or something special with sloped sides??
What kind of baking dish did you use? Just a pyrex square 8″ dish or something special with angled sides??
[…] (function(d,s,id){var js,fjs=d.getElementsByTagName(s)[0];if(d.getElementById(id))return;js=d.createElement(s);js.id=id;js.src='https://connect.facebook.net/en_US/sdk.js#xfbml=1&appId=249643311490&version=v2.3';fjs.parentNode.insertBefore(js,fjs);}(document,'script','facebook-jssdk')); (adsbygoogle=window.adsbygoogle||[]).push({google_ad_client:"ca-pub-8906354233528871",enable_page_level_ads:true}); Source link […]