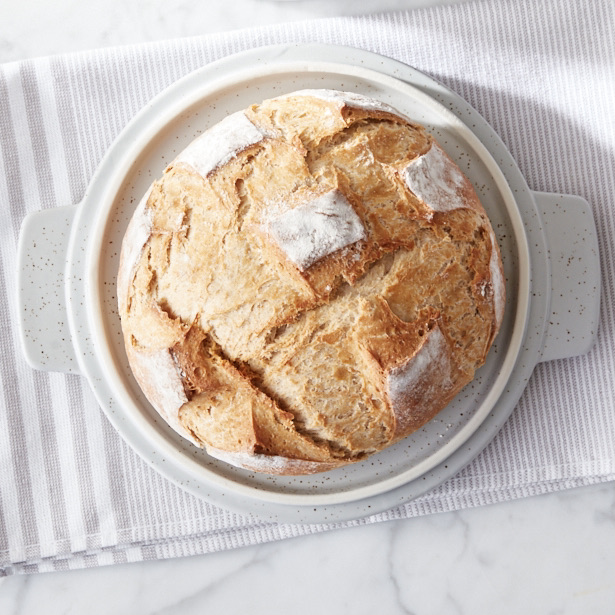
The zen of bread baking is something we take seriously and now we have one more way to achieve it. Using KitchenAid’s new ceramic bread bowl, we can now mix, knead, proof and then bake our favorite yeast breads ALL IN ONE BOWL. Even better, the bowl’s unique design improves each step of the yeast bread process. It warms to create the perfect environment for proofing the yeast mixture, offers a nonstick surface for kneading the dough, tracks the dough rise with lines on the bowl interior, replicates the conditions of a traditional steam oven, and delivers even baking heat for an artisanal quality loaf. Boom!
Want to get started with a no-fail recipe? This classic boule will not disappoint. Though the recipe for this perfectly crusty loaf has been developed specifically for use with the bread bowl, you can adapt nearly any of your favorite yeast bread recipes to use the same technique. Happy baking!

Classic Boule
Ingredients:
- 2 1/2 cups (375g) all purpose flour
- 2 1/4 teaspoons (6g) instant yeast
- 1 1/4 cups (292g) warm water (approximately 109-112oF/ 42-44oC)
- 1 teaspoon (8g) kosher salt
Directions:
- Prepare all your ingredients at your workstation. Warm the KitchenAid® Bread Bowl by filling it with hot water – then, pour out the water and pat dry. Add the flour, yeast, and salt into the Bread Bowl and affix it to your KitchenAid® Artisan Stand Mixer; insert the dough hook and lock the head in place. Turn the mixer to speed 2 to combine dry ingredients. After about 30 seconds, slowly stream in warm water. Allow the mixer to knead the ingredients for 1 1/2 – 2 1/2 minutes – or, until the dough pulls away from the bowl but is still wet. (It’s okay if some bits of flour remain around the edge.) Remove the dough from the hook, then place the dough in the bread bowl and dust the top of the dough with a bit of flour. Use a hand to turn and coat the dough in flour, then cover the bowl with the lid. (NOTE: The dough will be sticky. No need to form or additionally knead the dough at this point.) Let the dough rise for 60 minutes.
- Uncover the bowl and gently pull the dough from the bowl onto a generously floured surface. With dough in a rough round in front of you, pinch the top of the dough, stretch it away from you, then fold it into the center of the dough like you are folding an envelope. Give the dough a slight twist and do the same thing to the portion now at the top. Continue turning, stretching and folding the dough into the center for three to four full circles. (You will notice it gets harder to stretch the dough as you work.) After the final stretch and fold, flip the dough over, foldside down. Gently place both hands on each side of the round and gently curl your right palm around the right edge while using your left hand to rotate the round on the surface. This action will smooth the dough into a round mound.
- If needed, wash out the bread bowl and dry thoroughly. Then, generously flour the inside of the Bread Bowl and the top of the dough. Return the dough, seam side down, to the Bread Bowl. Cover the bowl with the lid and allow it to rise for 30 more minutes.
- While dough is on second rise, preheat the oven to 450°F/232°C. (NOTE: Set your rack as close to the center of the oven as possible while still leaving enough height for the lidded Bread Bowl to fit.) When ready to bake, remove the lid from the Bread Bowl and line the inside of the lid with a round of parchment paper (optional). Carefully invert the round from the Bread Bowl onto the parchment-covered surface (so the fold side is now facing up) being careful not to deflate it or disturb the shape. Dust out the excess flour from the Bread Bowl, then cover the dough with the bowl and place in the oven. Bake for 30 minutes. Carefully remove the Bread Bowl with oven mitts to expose the bread and finish baking for 10 more minutes, or until the crust is dark brown. Transfer to a cooling rack and let cool before slicing.
TO CLEAN THE BREAD BOWL
To remove baked on foods: soak in hot, soapy water for 15-20 minutes or as needed before placing in the dishwasher.
To remove any residue or staining: Use an abrasive sponge and a baking soda and warm water mixture, vigorously scrub residue to reduce staining appearance.

6 comments
Fantastic recipe! Simple and delicious.
Should we score the bread before baking?
You can if you like, but it’s not necessary. Here’s a Kitchenaid video that should help: https://www.youtube.com/watch?v=o3tws0nFEec
Is the flour to liquid ratio correct? My dough was more like a batter with 2.5 cups of flour to 1.25 cups of water
Yes. The dough should be quite sticky and gloppy.Check out this video for some visual reference: https://www.youtube.com/watch?v=WdzVh5IniFk
Happy baking!
My wife started making bread at home and I much prefer using recipes like this to get that beautiful crust. Thank you for sharing!