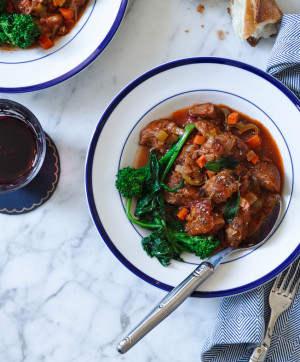
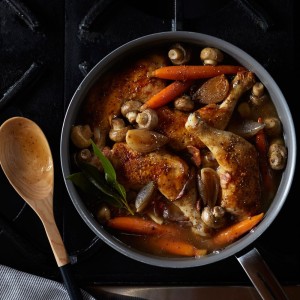
Braising, or simmering food slowly in a moderate amount of liquid, is an easy way to create tender, full-flavored meats and vegetables like coq au vin blanc or braised pork with broccolini. You can apply the technique to different cooking vessels, from a slow cooker to a traditional Dutch oven, because the same basic stages of preparation usually apply: browning ingredients to develop flavor and color; deglazing pan deposits and then heating the cooking liquid; combining the solids and liquid and cooking them gently, usually for several hours.
Read on to see our step-by-step foolproof guide to braising just about anything.
1. Start by Browning
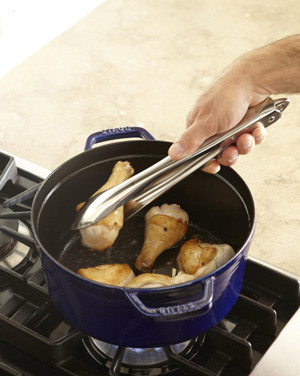
 First, start by browning meat, seafood or even vegetables in fat using a heavy-bottomed pan. Doing this prior to braising helps caramelize natural sugars present in food. By cooking over a medium-high heat, you’ll develop a rich surface color and deep flavor to your food that will only enhance the finished recipe. In most cases, you should trim the meat of excess fat and seasoned with salt, pepper and herbs or spices before browning.
Resist the temptation to lift pieces of food as they’re cooking; doing so can lead to a loss of moisture and sticking. When you’ve finished browning, it’s a good idea to transfer the food to layered paper towels to absorb excess fat before continuing with the recipe. You may also want to pour off any excess fat from the pan or Dutch oven before you deglaze.
2. Move on to Deglazing, Reducing & Boiling
 During the browning process, small food particles form deposits that stick to the hot surface of the cookware, creating what’s known as fond. Boiling liquid is the best medium for deglazing those rich deposits of flavor and color. Add broth, wine, spirits, juice or even water to the cooking vessel in which the food was browned and bring it rapidly to a boil. Stir and scrape the pan deposits with a wooden spoon, causing them to dislodge and dissolve in the liquid.
Some recipes call for boiling the deglazing liquid briskly for several minutes until it reduces in volume. This is done to concentrate the flavor, thicken the liquid and evaporate any alcohol. This stage also calls for adding any other liquids and bringing the whole mixture to a boil to jump-start the braising process.
3. Next, Assemble & Cook
If you’re using a Dutch oven, return the browned food and other solids to the boiling liquid. Cook the mixture in a preheated oven for even heat.
If using a slow cooker, put the main solid ingredients in the crock first (these items take longer to cook, and heat comes primarily from the bottom). Then transfer the crock to the slow cooker base and add the boiling cooking liquid. Cover, set the heat and cooking times, and walk away — your work is mostly done!
4. Finish and Serve
 Many braised dishes are ready to serve just as they are, straight from the cooking vessel. If you’re preparing a fatty cut of meat, it may benefit from skimming fat off the top first with a spoon or ladle before serving.
As a bonus, most braised dishes taste even better when reheated the next day. Start a day or two ahead when cooking for guests, or make a big batch for the whole family to enjoy.


3 comments
You sell all these braising sauces and NO INFO on them
[…] Braising, or simmering food slowly in a moderate amount of liquid, is an easy way to create tender, full-flavored meats and vegetables like coq au vin blanc or braised pork with broccolini. You can apply the technique to different cooking vessels, from a slow cooker to a traditional Dutch oven, because the same basic stages of preparation usually apply: browning ingredients to develop flavor and color; deglazing pan deposits and then heating the cooking liquid; combining the solids and liquid and cooking them gently, usually for several hours. ~ taste {Williams-Sonoma} […]
[…] to its hearty, stew-like consistency. Brush up on the cooking method with our easy step-by-step on how to braise anything, then bookmark one of the recipes […]